
DIY - How to Use a Flower Press
- Chelsea Stolte

- Jun 25, 2025
- 3 min read
Updated: Jun 28, 2025
Looks like you came to the right place! There are plenty of flowers out in the world just waiting to be dried and squished for arts and crafts!
Just looking for pre-dried flowers?
I have some in the DIY Shop - Red/Yellow
Don't forget to use FREESHIP over $10 orders!

There are many variations of flower presses out there, the one I have is kind of a special size so be mindful with the paper refills if you end up buying off amazon: https://amzn.to/4nieHxl
Pros to Pressing Your Own Flowers
Local / Homey Feel
CHEAP (who doesn't love FREE)
What can I use pressed flowers for?
Soaps
Candles
Scrapbooking
Bookmarks
Resin Art
Lanterns
Greeting Cards
The List Goes On...
What flowers should I start with?
Rose Petals
Dandelions
Seasonal smaller flowers in bloom
Dragon's Breath
Hydrangeas
Lavender
Poppies
Alliums
Equipment:
Wood Flower Press (wing nuts / screws)
Replacement Blotting Paper (check your flower press paper size)
You can find A4 here: 10 Pack A4 Flower Press Blotting Paper Pack | DIY With Chelsea
Cardboard to put in-between layers
Do NOT USE PAPERTOWEL OR WAX PAPER (can stick or leave a residue)
Prep Work:
Pat Dry Flowers (thicker flowers might need to be thrown into the dehydrator)
Let your flowers sit over night in a cool dry place
Open your flower press and line a single layer with your flowers of choice
Make sure there are no bugs hanging out in cervices

Roses Inserted Into Flower Press
Tighten Your Wing Nuts:

What now? Wait 1-2 Weeks to get them completely flat. I found roses and smaller flowers only take a week while you will have to wait longer for thicker/larger flowers.
Hello 2 weeks! Here are the pressed flowers. I also have some additional tips and advice based on my results.
I dried out a flower that had seeds in it! Collect them in your seed saving book and save those for planting next year!

blotting paper with seeds It is best to get flowers before or after a rain episode, as there is moisture hiding between petals.
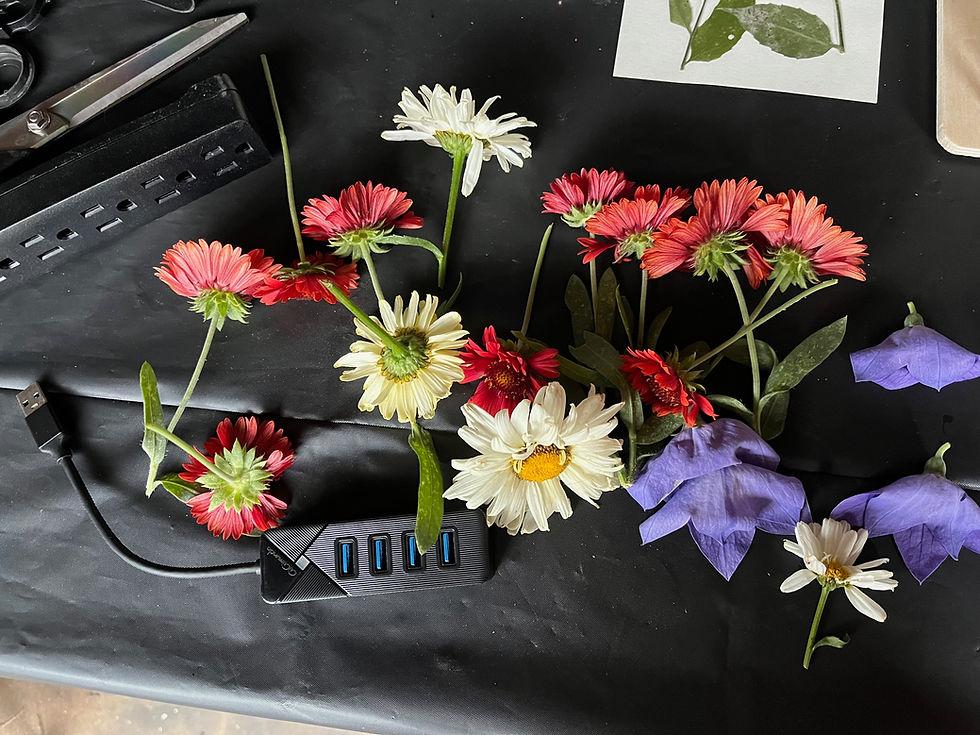
You need to cut very close to the petal base - removing green leaves. Take a look at white and red "daisies" These are my next batch of pressed flowers, along with balloon flowers.

Balloon Flowers, Daisies, Rose Petals, Flower Press What the heck did you pick? Get yourself a identification book for wildflowers - I found one this week at a local garage sale, what are the odds?

Wild Flowers - Pamela Forey and Cecilia Fitsimons 50 cents was a steal, I found one on Etsy if you were interested in this book!
Some of my flowers were dirty, thank you rain, so they dried "dirty" oh well, it is ART now, but be mindful of this!

unknown wildflowers pressed with flower press When stacking in the flower press, you should have blotting paper on both sides, I tried to be skimpy with some with cardboard on one side and blotting paper on the other, just don't do it.

Show me what flowers you pressed and what you used them in!
I used my pressed lavender in my goat milk soap recipe: DIY Lavender Goat Milk Soap Bars
~DIY With Chelsea
6.25.2025

Comments