
Tiled Wooden Planter - UPDATES AT BOTTOM
- Chelsea Stolte

- Apr 27, 2020
- 3 min read
Updated: May 2, 2020
Good Afternoon!
I was bored and dug up some tiles my neighbor had given me back when my kitchen was orange. I found a "planter" box I haven't yet used from At Home, and went to work :D!
I will update tomorrow after I grout but here is a quick DIY tile planter idea!
1. Find tiles ;)
2. Solo cup and a wood shim (x2)
3. Mix a small amount of mortar (whatever color you have laying around) - make it peanut butter consistency and slap some on the back of the tiles and gently push down while twisting the tile a little bit.. and BOOM! Tiled planter.
4. Tape off all sides (so not grout touches the actual wood)
5. Add grout in between the tiles (color of your choice). I did two sides at a time so it would dry properly. I will do the other two sides tomorrow. I was even thinking about painting it some fancy color :)
6. Remove tape and viola. A "heavy" tiled planter ;)!

Skye definitely liked the box!

Have a wonderful evening!
Day 2:
Grouting technique is the same as if you were doing a tile floor, I used a wood shim to push the grout into the seams, and put in at a 45 degree angle... see video for example. Then you will need to take a grout sponge or a rag.... which I used. Gently rub in a circular motion while rinsing the rag a couple of times. Let it sit and then wipe again if you see a glaze on the tiles. See other pictures for examples of how I set up.
Drill holes in the bottom of your planter! I drilled two holes. For an idea, look at the hole size in a clay/plastic pot laying around.
Waterproofing the inside: I chose plastic roofing tar, not sure if I am going to regret it or not (smell-wise) If you choose to find some plastic/black garbage bag to put inside instead that will be just fine. **Update** So In the end I coated with tar AND a plastic bag.
---------------------------------------------------------------------------------------------------------------------------
Tip 1: Don't do this on your deck. I have to power-wash and repaint within the year so I do not care.
Tip 2: don't wash grout down your sink... dump outside or let dry out and throw away in a disposable container.
Tip 3: You will be fine just lining with a black garbage bag.. make sure to put holes in the bag as well.


Day 3:
Roofing tar was still wet...
Buy your herbs or flowers to put in box while waiting....
**Update** Buy pea gravel and potting soil while you are out, or you will be making a second tripe like me!
**Update** Also buy the black garden liner.....(my 3rd trip)
Day 4: Finally!

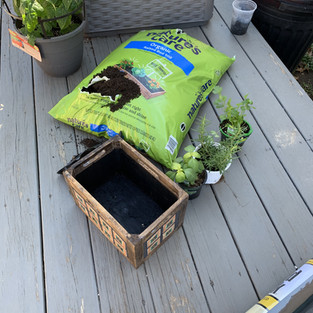


So, the pictures are out of order:
1. Line with garbage bag - cut as necessary to line up as high as you want
2. First layer is about an inch of pea gravel
3. Second layer is the black garden liner (it is under the soil in the middle picture) You will probably want to line it mid way up the box (I did not). This is to keep the soil from washing out of the box.
4. Add potting soil
5. Pot your favorite plants! (I used rosemary, basil, and cilantro)
Sorry, I got sidetracked and forgot to add the final pictures :).


Thanks for reading guys! Sorry it took me 4 days to complete this :)


Comments