
Repairing a Vintage Marvella White Strawberry Pearl Necklace
- Chelsea Stolte

- Sep 22, 2025
- 4 min read
Welcome to the mini history lesson, paired with a good ol' tutorial! Prepare yourself to invest an hour to an hour and a half to get this repaired, assuming you have all your tools ready to go!

Tools:
Soap / Water / Dish
Q-tips
Beading Needle (optional)
Ultrasonic cleaner (optional)
Ultrasonic cleaning solution (optional)
Set of fine tweezers
One long Sewing Needle
Pocket knife (optional)
Set of Fine Needle Nose Pliers - Jewelry pliers would be best
Scissors
Nylon jewelry string
Replacement pearls (optional)
Patience & a well-lighted area (you need this)
What is Marvella and when was it formed? Well, Marvella is a type of costume jewelry company that originated in 1911. The company was formed in Philidelphia, Pennsylvania. The founder's name was Sol E. Weinreich. They offered necklaces, brooches and earrings, among other items.

Although their jewelry looks like pearls, they are indeed all imitation pearls. They look similar but always do a check if you have an unmarked pearl necklace!
So, why this piece of jewelry to repair? After some research I found only two other items off eBay and the internet that matched, and they seem to be going for over $200 a piece. Keep in mind, while this specific piece of Marvella jewelry might be rare and worth something, not all pieces will be.
In this tutorial I will be breaking down the following:
Type of string to mimic current
How to remove clasps
How to clean clasps
How to clean faux pearls
How to assemble pearls with & without a needle
How to re-assemble
Let us get started in our pearl necklace repair!
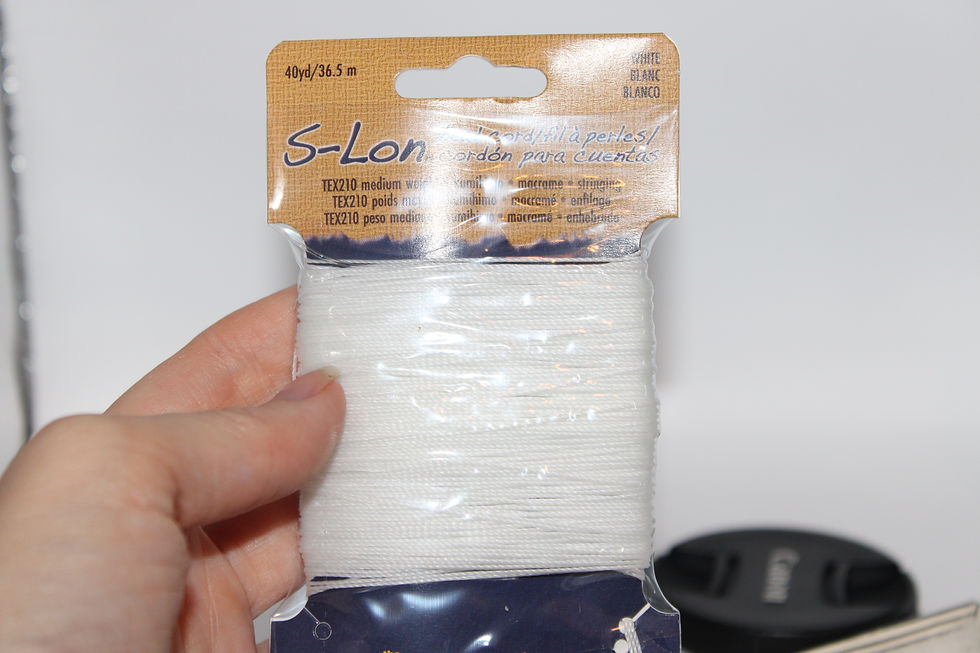
Type of string:
I went with a cost-efficient string called S-Lon. I found this at Michael's craft store for about $5. This is a 3-ply, twisted and bonded nylon cord.
Make sure you know the internal size of your pearl, you can use calipers to check this or a ruler with mm available. Remember the cost of repairs adds up and you want to make sure you will make your money back if you are re-selling.

How to Remove Clasps
A fine set of pliers or jewelry pliers will work. With normal clasps I would tell you to be extremely careful as you can break them. I was worried with these, but not so much any more. These older clasps are made well, and out of a sturdy metal.
Simply hold the clasp and pry open the side that is not attached to the actual clasp. It usually does not need much force.

How to Clean Clasps
If you do not have an ultrasonic cleaner, fear not. you can just take a toothbrush with soap and water to these clasps. I chose the cleaner as they are super tiny and I would probably scrub one so hard it would end up under the bed.
Ultrasonic Cleaner:
Be careful if you do not know what your jewelry is made of, this ultrasonic cleaner can strip some costume jewelry and leave it more dull than it was.
*If there is still grime on the clasps, take a toothbrush or needle tip to get into the crevice's.

How to Clean Faux Pearls
First off, what do you do if one is broken or peeling... When shopping around for replacement pearls you have to keep in mind the diameter of current pearl and size in mm of inner hole. Don't forget the color! You have yellow, pink and white pearls. Try to find the correct shade and size for your necklace. If a little "off" I would suggest putting the pearl near the clasp so it is less noticeable.
*You can find these on Etsy, Ebay, Amazon in bulk.

Onto the cleaning:
Add 1 Tsp Dish Soap to 1 Cup Water
Soak 5-10 minutes
Scrub with a microfiber cloth, Q-tips, other non-abrasive scrubbers
Rinse off in a clean bowl and set on paper towel to dry

How to Assemble Pearls on New String Without Needle (20 mins a strand)
Cut your string length to be equal to current plus about 2 inches, one inch of extra per end. This is to help you put the string back into the clasp and secure it with some wiggle room.
Tie a knot about 1" from the bottom of the string, a simple knot will work. This is to keep the pearls from falling off.
Start transferring pearls over one by one. This can be tedious, some of the holes are more rough than others. I found a pocket knife helps clean up the hole while a needle helps with clearing out the inner diameter. This may not be needed.

Your pearl necklace repair is underway! don't let the time-consuming beading stop you in your tracks! The finished product will look amazing!
Ok, I am back with the results, I started this blog the week of 9/15/25. Unfortunately I ran into some show-stoppers. Lost pearls, tying small knots is very tedious. Advice: Have some jewelry glue on hand to help you when tying knots to put the clasps back onto the necklace.

For Sale - Here:
~ DIY With Chelsea
9.22.2025

Comments