
DIY Carboard Box Gingerbread House
- Chelsea Stolte

- Dec 1, 2024
- 3 min read
Who has tons of random boxes laying around? If this is you, put those boxes to good use this season for a magical scene!
What happens if my boxes don't make a perfect square or rectangle? No problem. This is where a large roll of craft paper, and a pair of scissors will come in hand. Remember, all imperfections can be covered with decorations!
Let's get to the getting! Happy Holiday's 2024!

Materials:
Miscellaneous boxes (Amazon, Home Depot)
Note: I used some 12 pack - soda boxes as well
Inserts from my amp energy drink boxes were used as the snowy drop in the front that was sprayed with
Kraft Paper (large roll)
Amazon.com: PerkHomy 36" x 1,440" (120') Brown Kraft Paper Roll for Craft Bulletin Board Paper Kids Art Table Covering Crafting Gift Wrapping Bouquet Packing Parcel 70GSM 50LB (Brown, 36" x 120')
Foam pack 12x17.5 multi color
Amazon.com: Better Office Products 20 Pack EVA Foam Sheets, Extra Large Sheet Size, 12 x 17.5 Inch, Assorted Colors (20 Colors), 2mm Thick, for Arts and Crafts, 20 Sheets : Arts, Crafts & Sewing
Tape / packing tape
Hot glue gun
Cheap acrylic paint brush
Acrylic paint (color of choice)
White paper plates (25 count did my roof)
Scissors / sharp knife
Ruler / cutting mat
Foam balls (for either candy on a stick or for doorknob on door)
Cotton Balls OR multicolored pompoms in bulk package
Step 1: Drafting the plan
Find yourself some good gingerbread house examples. I looked at real gingerbread houses on Pinterest and went from there. I pulled it all together into this beautiful children's coloring below... no shame here, just a draft!

Step 2: Assembling the boxes
I had two matching medium home depot boxes that became the base, topped with some amazon boxes, next the roof was also a medium sized box that matched the two base boxes. This should help you with eyeballing the size. You will need your sharp knife or razor to cut the boxes where needed. Play around with them, if this is a display like mine, no one needs to see the back, right? It is like choosing the best side of your Christmas tree.
For the base:
Do some cutting and modeling to make it a perfect gingerbread shape. Remember that you do not need to worry too much if you Frankenstein it together. The Kraft paper will take care of the visual.

For The Roof:
Cut open the box of choosing to lay out flat, you need to glue a support where the box originally bends:
Insert example here**
Step 3: Attach all the boxes together. I used packing tape to keep them all together. You could potentially used glue but no one is going to see your tape job under the Kraft paper :)!
Step 4: Wrapping in Kraft paper
The paper is quite thin and easily tears as you will see, so lightly roll it out to measure for your roof and other sides. If your boxes are all taped together you can wrap them all the way around. Mine were wrapped in two different sections as my boxes were not the same width.

Step 5: Making The Roof flaps with Snow
These fancy little pieces of carboard came from my AMP Energy cans, if you do not have these you can just cut some cardboard to imitate. If you have other things that look like this laying around, put them to good use!


Step 6: Making The Roof Shingles
I snagged two 25 packs of medium sized plastic plates and cut out the centers, then halved them. You will need to half the halves when you go to finish off the roof.


Step 7: Doors and windows
Use the foam to create these. I used a tape measure to get some straight lines to paint across. Later on I added red pipe cleaners to match the front door and make them pop. You will see in the final concept.


Step 8: Putting it all together!
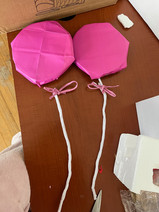
OK, you got all the basics together. Let's decorate! I found tissue paper, old tins, cotton balls, pipe cleaners, dollar store ornaments, dollar store candy canes, dollar store gingerbread lights (automatic timer with a battery), a wreath from a garage sale, and other odds and ends I found around the house. This can be quite cheap if you can wrap objects, then unwarp them at the end of the season to put to other uses :).


Everyone have fun and be safe out there this holiday season!

~DIY With Chelsea


Comments