
Garage Door - Painting
- Chelsea Stolte

- Jun 6, 2020
- 4 min read
Updated: Jun 14, 2020
Good Morning,
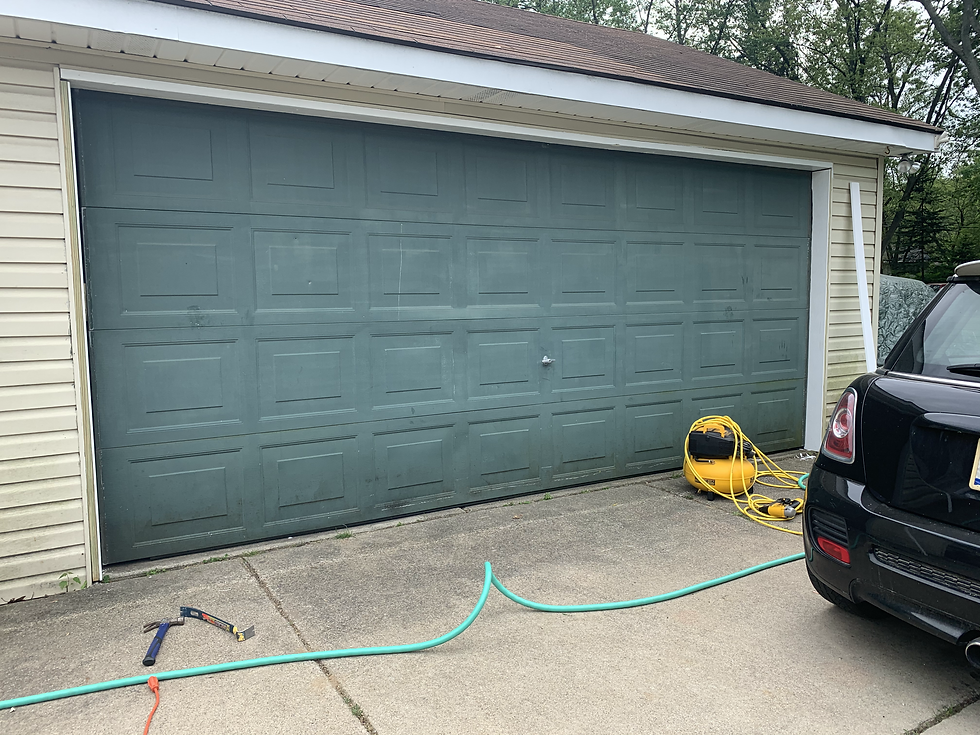
I've chosen to paint the house/garage a shade of blue, and the green door just wasn't going to work! In addition, I was quoted at around $3000.00 to paint my house and garage... Overall.. I would suggest if you are on a budget, it is 100% worth it to invest in a paint spray gun instead of paying someone else to do it.


#1 Tip: Replace your trim AFTER you paint. :). If you notice the top layer of trim has the little rubber flap for your door to sit behind so you will be unable to paint behind it unless you pull it off.
#2 Tip: OVERSPRAY: I would cover the ground and surroundings (including the vinyl siding on the front with plastic drop). In the final picture you can see in the corner right of the garage where overspray hit.
#3 Tip: Wear eye protection, mask and clothes you don't mind getting paint on.
#4 Tip: Try not to paint in direct sunlight / make sure you use up your paint fast, as it will dry up quite quickly in the paint gun. <75 degrees would've been ideal.
#5 Tip: Clean up your paint gun IMMEDIATELY after using, following the manufacturer's directions.
Tools Needed:
Wagner airless paint sprayer Pro 130 - $220.00
See post on garage door trim ... you will need a nail gun to put trim back (optional)
Behr Ultra - outdoor paint - satin finish - $50.00 / gallon
Aluminum primer oil based (optional) - $10.00 / quart ( I used 3 quarts because they were out of the gallon sized)
Drop cloths (plastic)
Painters tape
Mineral sprits / acetone
Latex/oil Paint brushes (for touch ups)
Cardboard pieces or plywood (for practicing with the paint gun)
Eye protection
Gloves
Mask
Adjustable wrench (for tightening the paint gun components)


Preparation:
Make sure to move anything away from your project area, I'd say overspray could hit about 10 feet. In addition, get out your plastic drop cloths, and line the floor, and AROUND the siding too. I didn't bother because I have white trim AND I am repainting the vinyl siding soon. Tape off your door handle!
Ok! Time to take out that paint gun!
Paint gun steps:
Read the IMPORTANT information supplied with your paint gun. ESPECIALLY the part where it says leave your gun unplugged until ready to use.
Assemble the paint gun as noted in directions, make sure you have your wrench handy.
Read the directions on how to prime. You will need the acetone/mineral spirits for this.
Priming: Grab an old gallon of paint (empty) OR a container to put the priming liquid into. When setting up the gun, make sure you set the knob to "Prime". I would also suggest wearing eye protection. First, you want to press the little screen in the bottom a few times. Next you will want to pour enough acetone into the bottom screen area to fill, then you will switch on and it will pump through your priming tube (into your old bucket). You will run until there is nothing left in the tube. NOTE: If you are just using latex paint you can run water through. Acetone is for oil based paint. Finally, you can pour your paint into the gun reservoir. You must still prime, so do the same exact thing, just run it through until the paint starts coming out (see video). Once the paint starts coming out, make sure you stop, turn the switch to operation mode and squirt a bit of paint through the actual nozzle of the gun.
Paint nozzle:
You want to instal the paint nozzle after you prime. There is also a "pin/valve" that you have to insert into the nozzle. I'm not going to lie, It too me a few to figure it out. Anyways, just remember when the valve is in line with where the paint sprays out, it is ON. Also, there are TWO paint patterns, one for painting vertical and one for horizontal. I used horizontal for the garage. Play with it on you practice cardboard!
Practice makes perfect!
Make sure you PRACTICE on a piece of cardboard or wood before starting. Mine squirt out a little bit and would've just ruined my paint job! Also, practice unwinding the hose before starting ;)
Painting:
1. Once you have your technique down, you will want to make sure you coat the door in even sprays, I would do a swipe by and then kind of flick my wrist out so it would not leave an immediate end mark. Once you get started this took almost NO time! I used a metal primer first (oil based) just to be safe, but was told I really did not need to do this. All in all, I used 3 small $10 quarts of primer and almost a gallon of outdoor latex paint. It took me ONE coat of primer and TWO coats of outdoor paint. I waited about 30 minute between coats because it was 85+ degrees.

2. The creases between the garage door panels, I have not painted mine yet, BUT I would suggest you open the garage a small amount and try to use a brush to get in there. In reality no one will see this unless the garage door is partially open.
Cleaning:
Follow the manufacturer's instructions immediately after painting to clean out the bucket/lines. If you have any paint left, put it back into the gallon. You do NOT want the paint drying inside the system. Cleaning will most likely vary between paint guns, so make sure you check!

All Done :)! Don't forget to put your molding back up once the paint dries!


Painting your garage door with weather-resistant paint not only enhances its look but also protects it from harsh elements, ensuring lasting durability! modern garage door mechanism restoration Napa